
ZXW no longer requires the dongle. Please see our instructions on how to install version 3.x!
https://www.microsoldering.com/how-to-setup-and-install-zxw-tools-v3-x/
So, you recently purchased ZXW Tools from our online store or Amazon and have no clue how to set it up? Well, here’s a quick guide detailing the installation process.
Step 1
Unbox the ZXW tools dongle and plug it into your Windows PC. ZXW tools does not support Mac at this time, so you’ll need a Windows compatible box.
Step 2
Download the ZXW Tools software. The ZXW tools website is in Chinese, but lucky for you, we’ve made it easy for you to download the latest version of their software directly from our website. The zip file contains all of the files necessary to run ZXW Tools (trace) and Blackfish (schematics). There is no installation process. You just need to copy the files over to a directory on your desktop.
Step 3
After you’ve copied all of the files over to a folder on your desktop, then just run the ZXW tools executable.
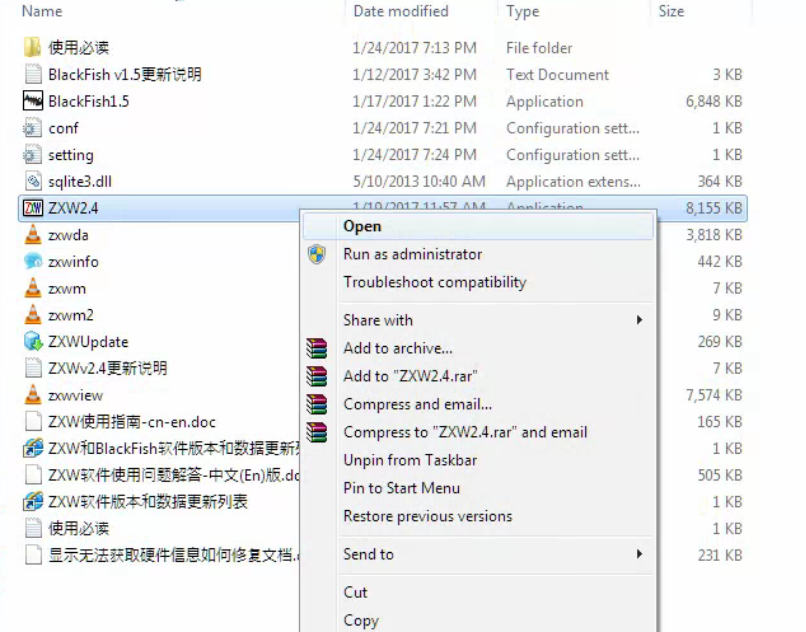
When your first run the software, the program will ask you if you want to activate the dongle on your computer, which will start the 1-year subscription. Just say “ok” to that.
Step 4
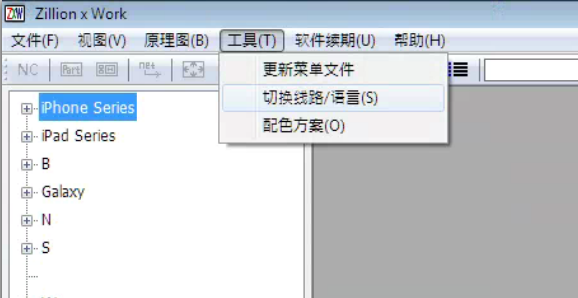
The default language is Chinese, so you’ll want to change the language to English. To do that, select the fourth menu option with some Chinese characters and “(T)” at the end of it, then select the middle option, which is the Settings menu.
Change the language to “English”, click on “save selected”, then “Ok”.
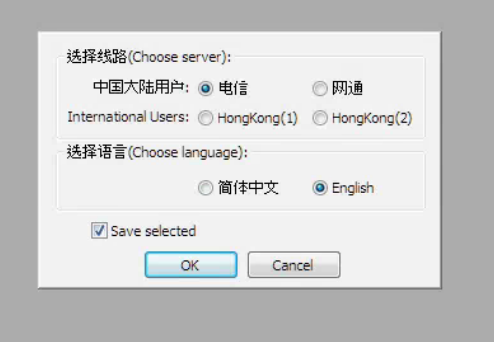
Restart ZXW tools and the language should now be English.
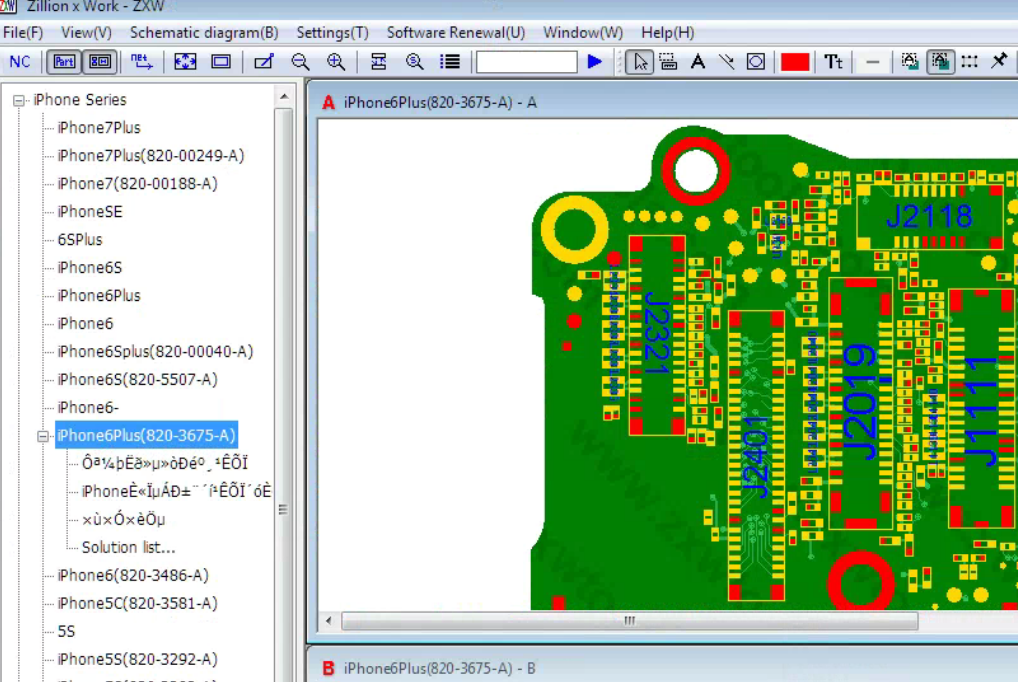
Step 5
To load one of the schematics for a certain phone, just select the phone model from the list on the left and double click. The schematics are updated periodically via the internet, so there is no need to buy a new dongle or download the software with each new update. It’s done automatically.
That’s it!
This looks great’, I’ve been doing pdf searches to locate components and while I can always locate, it does involve more time and effort. I have a few questions before going ahead.
Is there a yearly charge for the use of the software regardless whether you update from the latest version 2.4?
Your video was very helpful but the dongle was stated to be $80! Not the $109. On your site currently. Is the former dongle available?
I have downloaded the program using the links yo provided and realize I need the dongle to run it but is the dongle purchase all that is necessary for full use of the software?
Are you an agent for this software? Do you provide operational support if needed for software glitches or for dongle issues?
I just want to be sure I have stateside support in case this product does not function properly. Please advise ASAP
Hi,
I have the ZXW tools dongle , but I can not visit the schematic diagrams(Black fish).
It starts up and is loading but each time I have a empty screen .
The Zillion X work (lay-out pcb-boards) works fine.
Any ideas to fix Black fish ?
Kind regards
Koen
very good in the dongel
please I have this problem, my dongle detected normally in device manager.but when i open zxw software it shows dongle not found.
tanks